Creating a one-day tournament (open ring)
Step 1. Go to your personal account
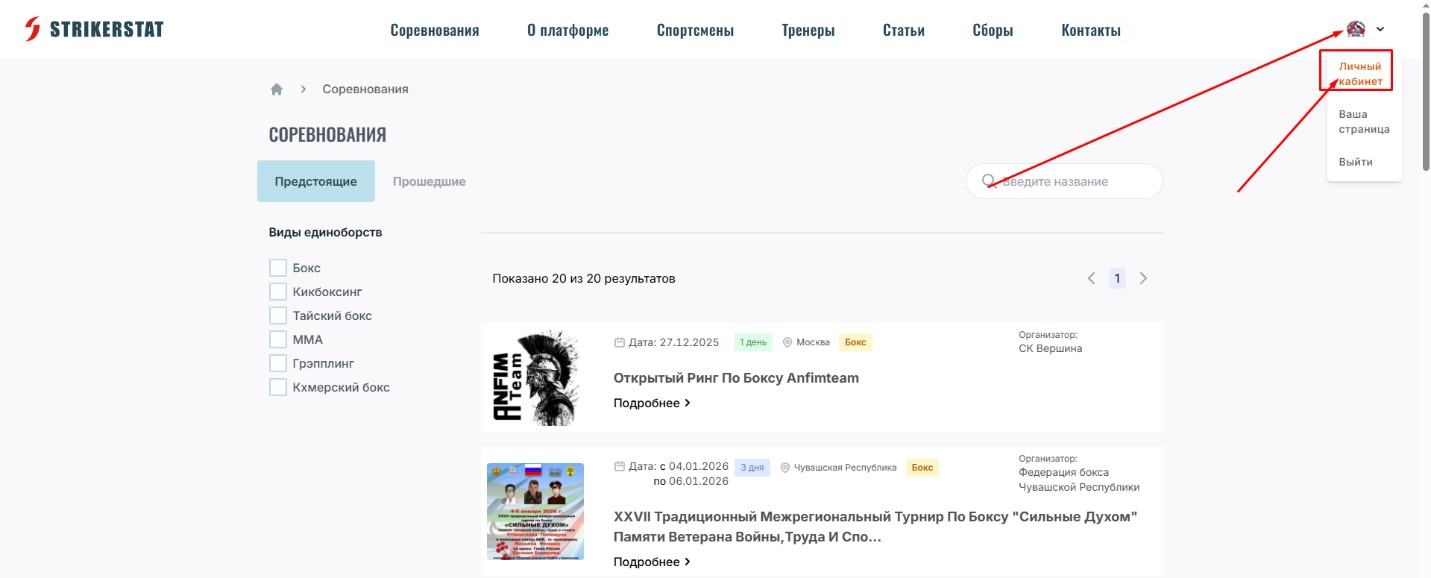
Sign in with an "Organizer" account and go to your "Personal account".
Step 2. Create an open ring
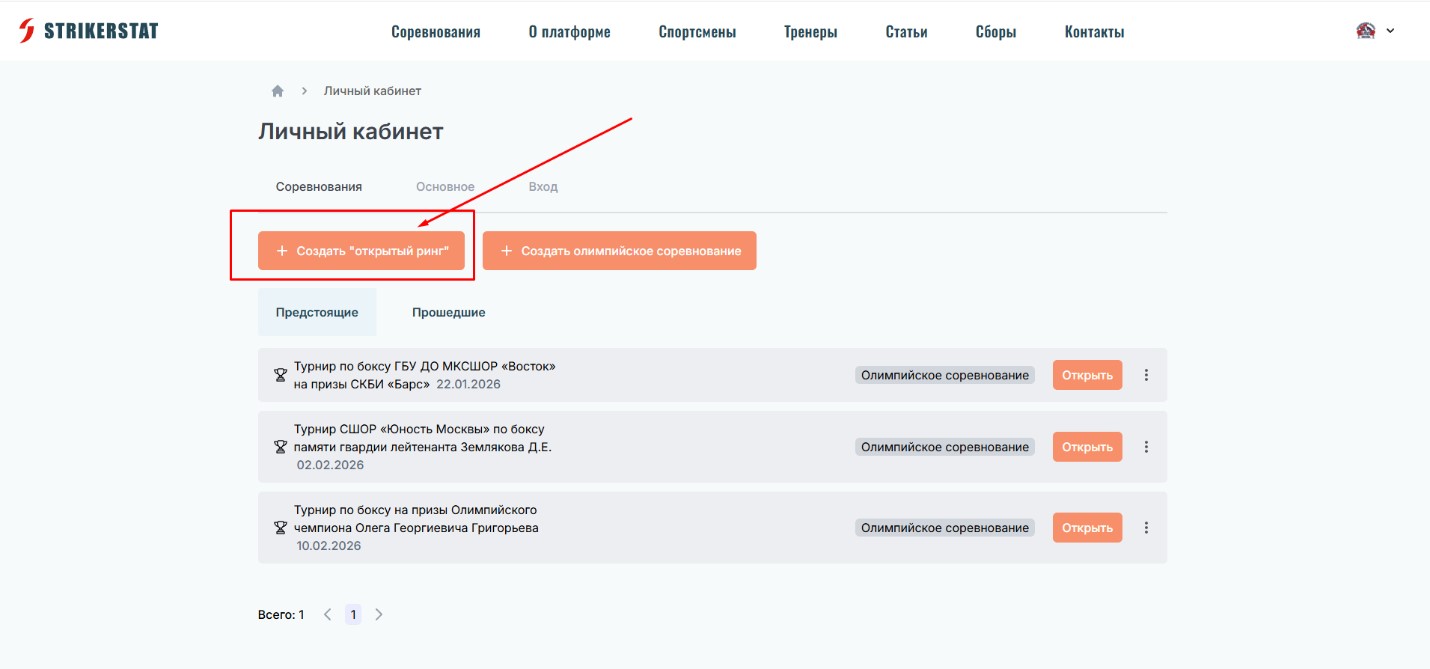
Click the "Create open ring" button — a form with information about the planned competition will open.
Step 3. Fill in the basic details
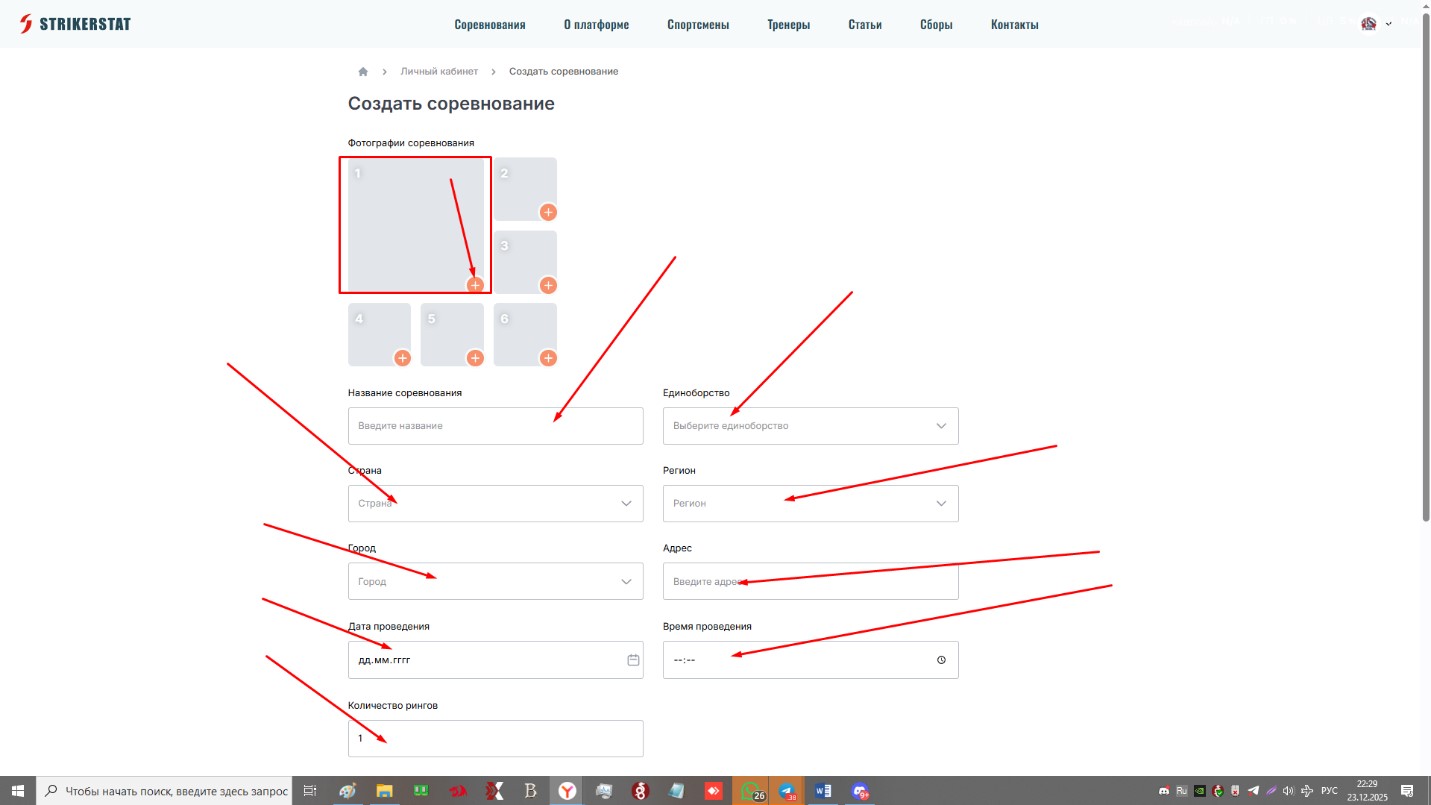
Fill in the fields on the page:
- Tournament photo (minimum 1, maximum 6)
- Tournament name
- Combat sport
- Country, region and city of the event
- Tournament date and start time of the competition
- Number of rings
Step 4. Tournament regulations and contacts
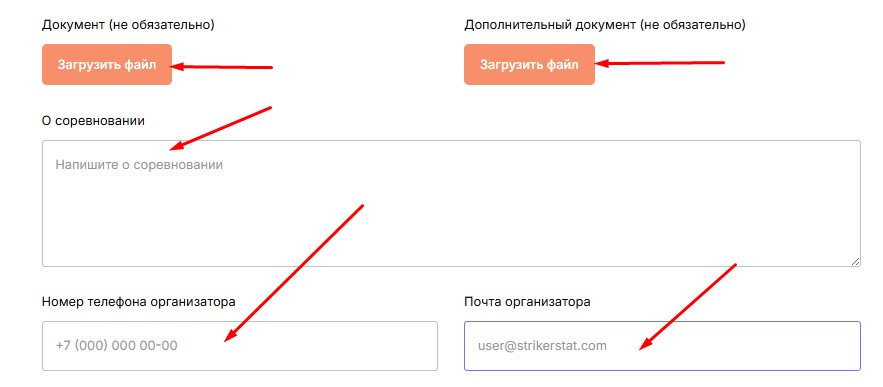
Upload the tournament regulations — you can attach up to two files in PDF or MS Word format — and add more detailed information in the "About the competition" block. After that, enter the contact details of the person responsible for the tournament.
Step 5. Configure the draw
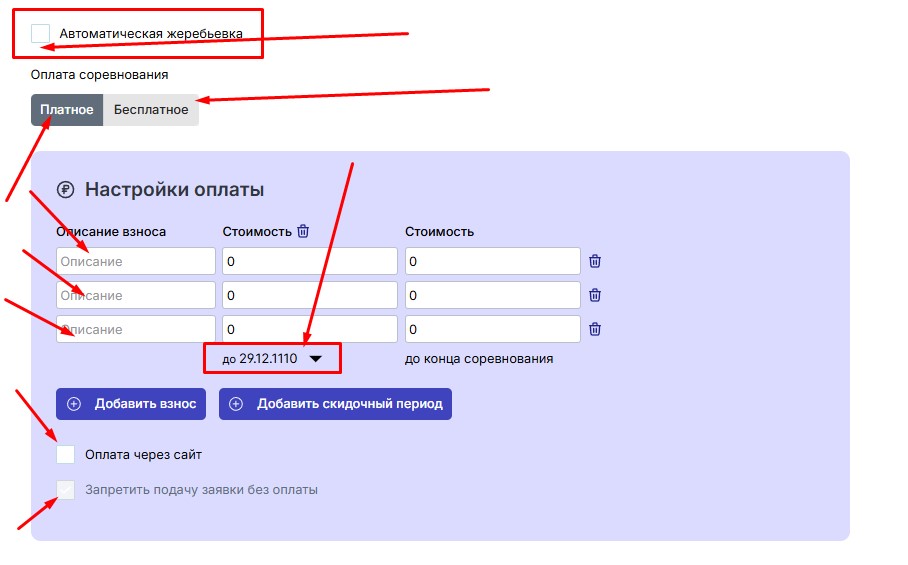
If you want pairings to be formed automatically, check the "Automatic draw" box. To pair participants manually yourself, leave the field unchecked.
Step 6. Configure entry fees
If the competition has no entry fees, click "Free". If entry fees apply, click "Paid" and set up the payment rules in the table — you can grade the cost, for example by age or by the fighters' skill level. To add a payment option, click "Add fee"; to remove one, click the trash icon to the right of the row.
You can also limit the entry cost by payment deadlines: click "Add discount period", choose a date on the calendar above the button — fees will apply at a discount up until that date. You can add up to three such periods.
Indicate how payment will be made: the "Payment via the website" checkbox enables accepting payments directly on the platform. The "Prohibit applications without payment" checkbox blocks applications from being submitted without prior payment.
Once all fields are filled in, click "Create".